02Programming in Makecode
Quick start
Open the Makecode programming platform, https://makecode.microbit.org/, and create a new program.
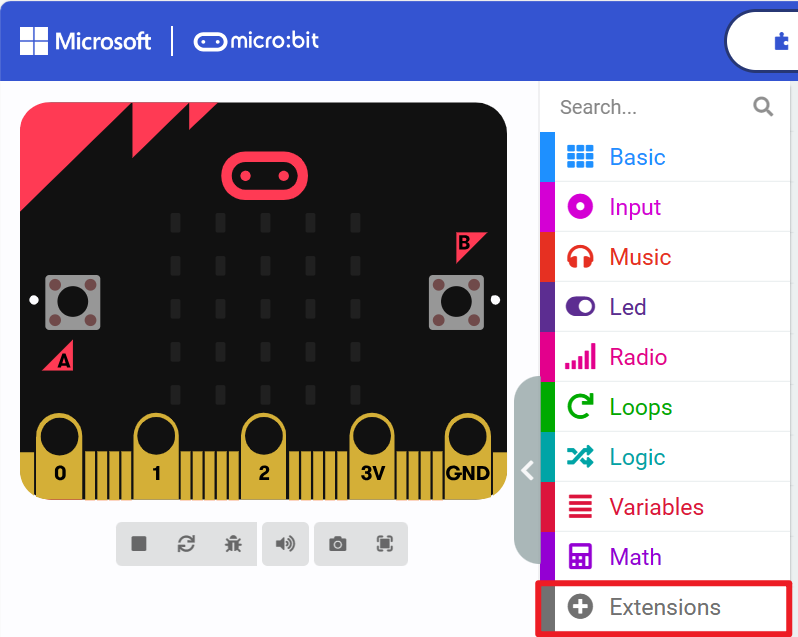
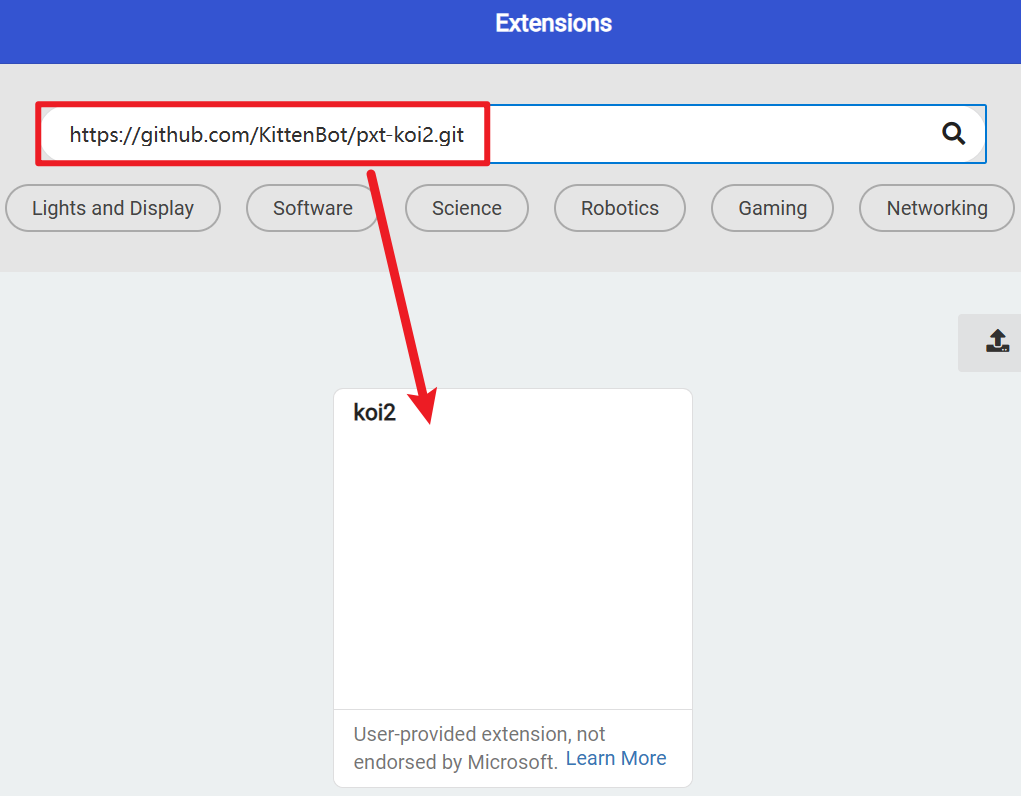
Add extension-KOI2 extension address is:https://github.com/KittenBot/pxt-koi2.git
KOI2 extension has been successfully added
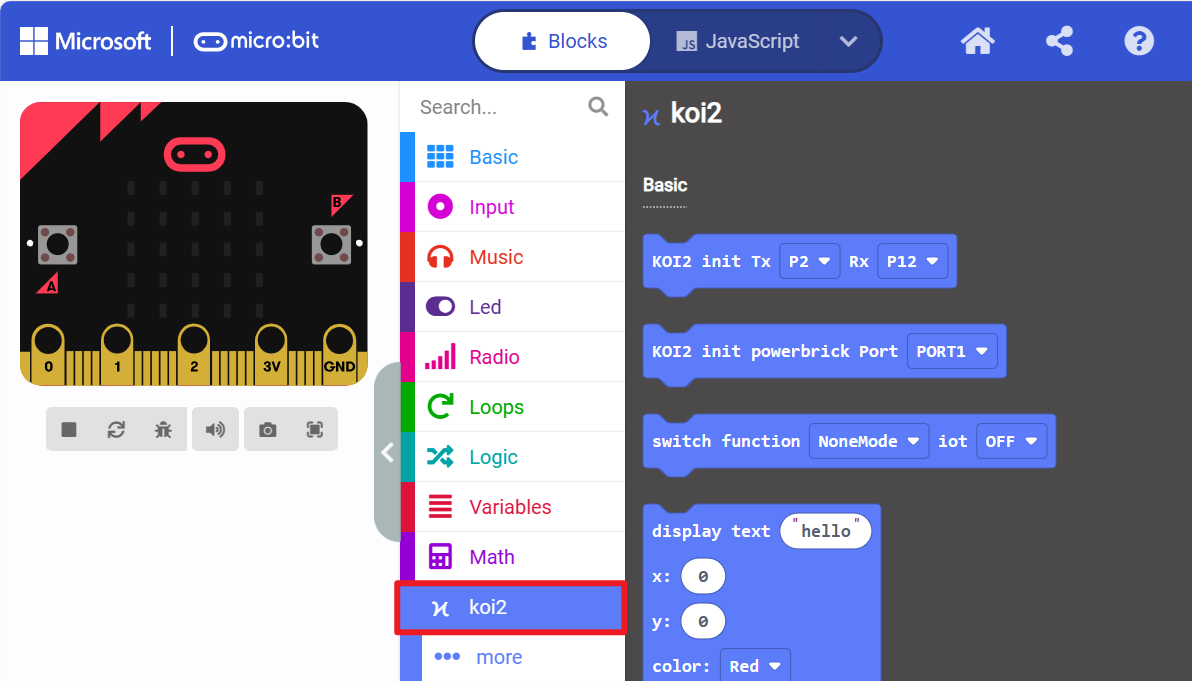
Congratulations! You can start your KOI2 AI learning journey now!
Hardware Wiring:
Hardware List:
Microbit v1/Microbit v2
Robotbit Edu expansion board
4PIN connecting cable
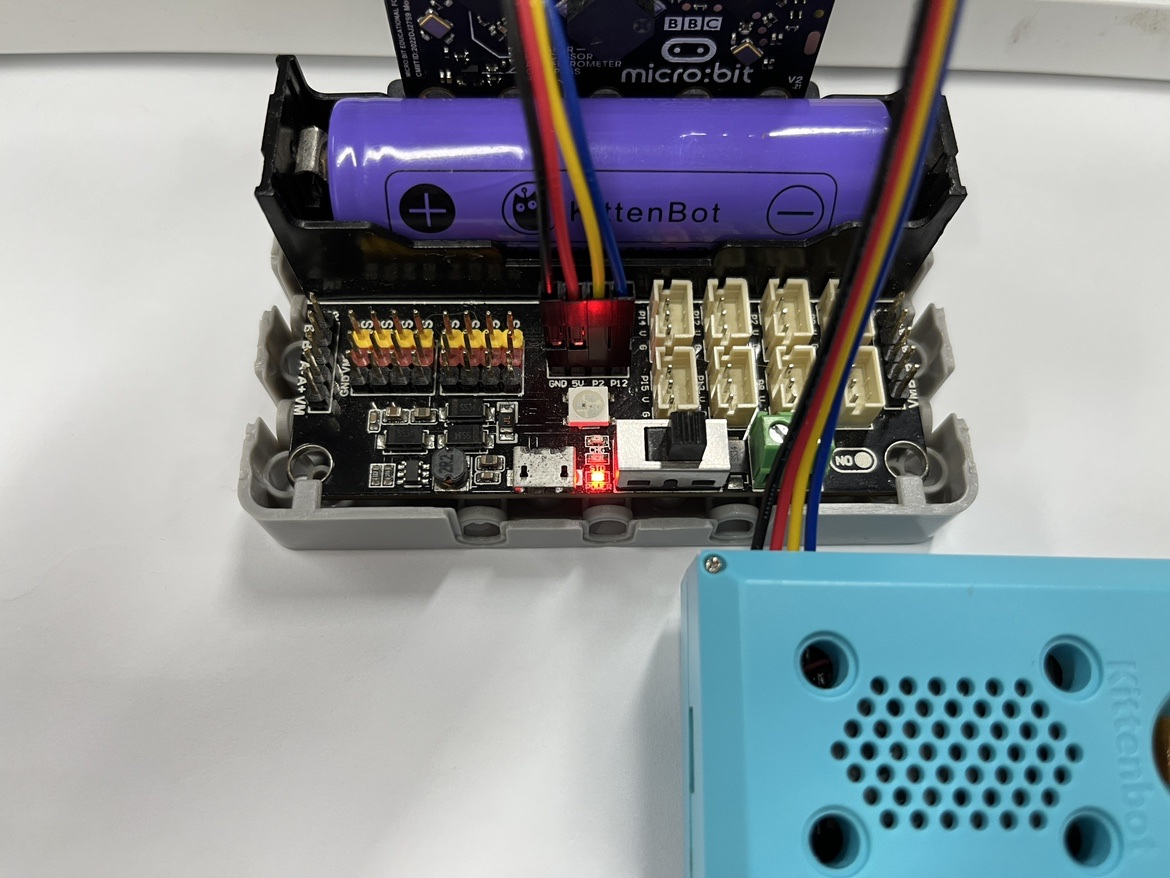
KOI2 module Wiring diagram:
Black wire—>GND
Red wire—>5V
Yellow wire—>P2(TX)
Blue wire—>P12(RX) Make sure that the Robotbit power switch is on and the battery is sufficient.
Notes:
1、Please connect the KOI module in advance, and make sure the power switch on the expansion board is turned on. At this time, the KOI module screen can display normal images, then download the program.
2、After downloading the program, the KOI module will switch to different AI modes according to the program, and the corresponding mode prompts will be displayed on the screen. If the mode switching is not effective. Please press the reset button of Microbit.
3、When Microbit and KOI module are disconnected from the computer data cable. After turning on the power of the expansion board, wait for the KOI module screen to display a normal image, then press the reset button of Microbit to restart the program.
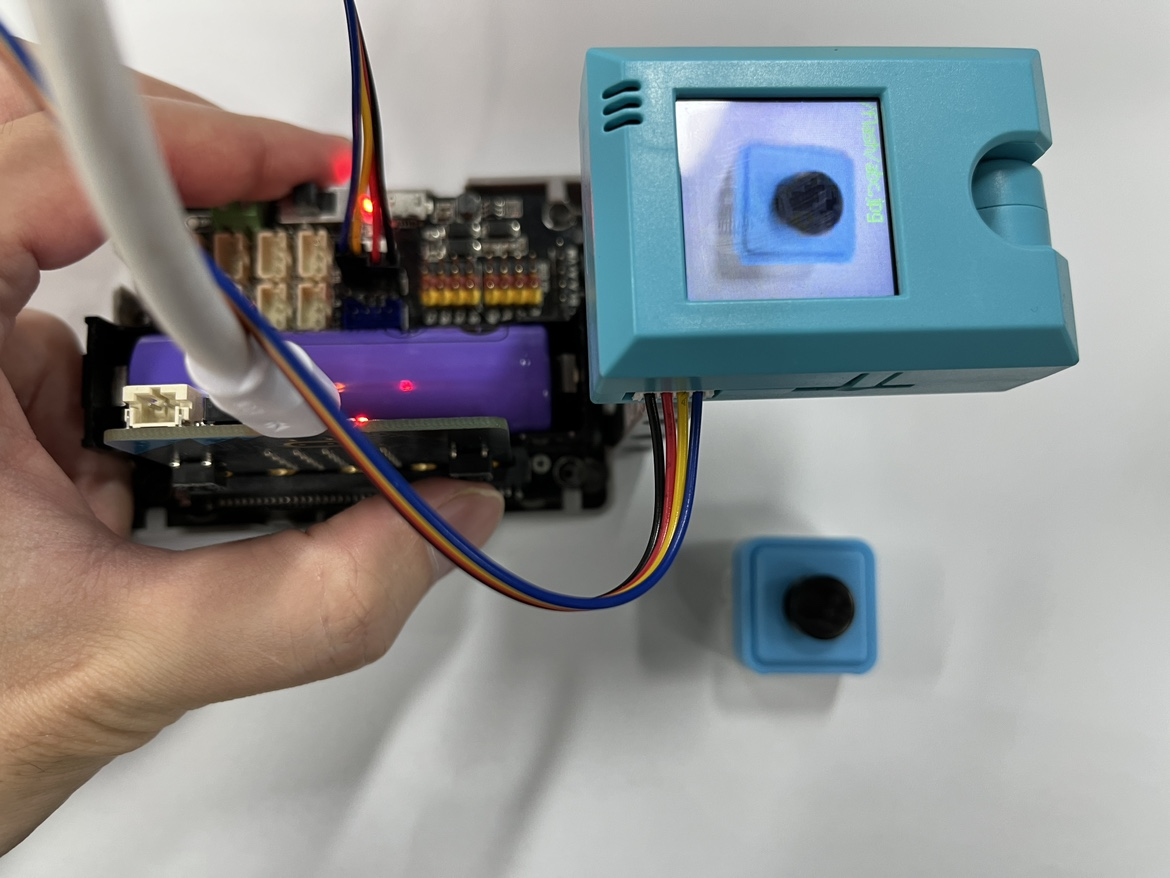
Case 1: Take a Photo
Introduction: The KOI module has a photo-taking function that can save photos to the memory or SD card (if you have a lot of photos, it is recommended that you store them on the SD card for easy access on the computer).
Program:
https://makecode.microbit.org/S59000-70883-52174-05930
 Experimental Results:
When you press the Microbit button A, you take a photo.
When you press the Microbit button B, the KOI2 screen displays the photo.
Experimental Results:
When you press the Microbit button A, you take a photo.
When you press the Microbit button B, the KOI2 screen displays the photo.
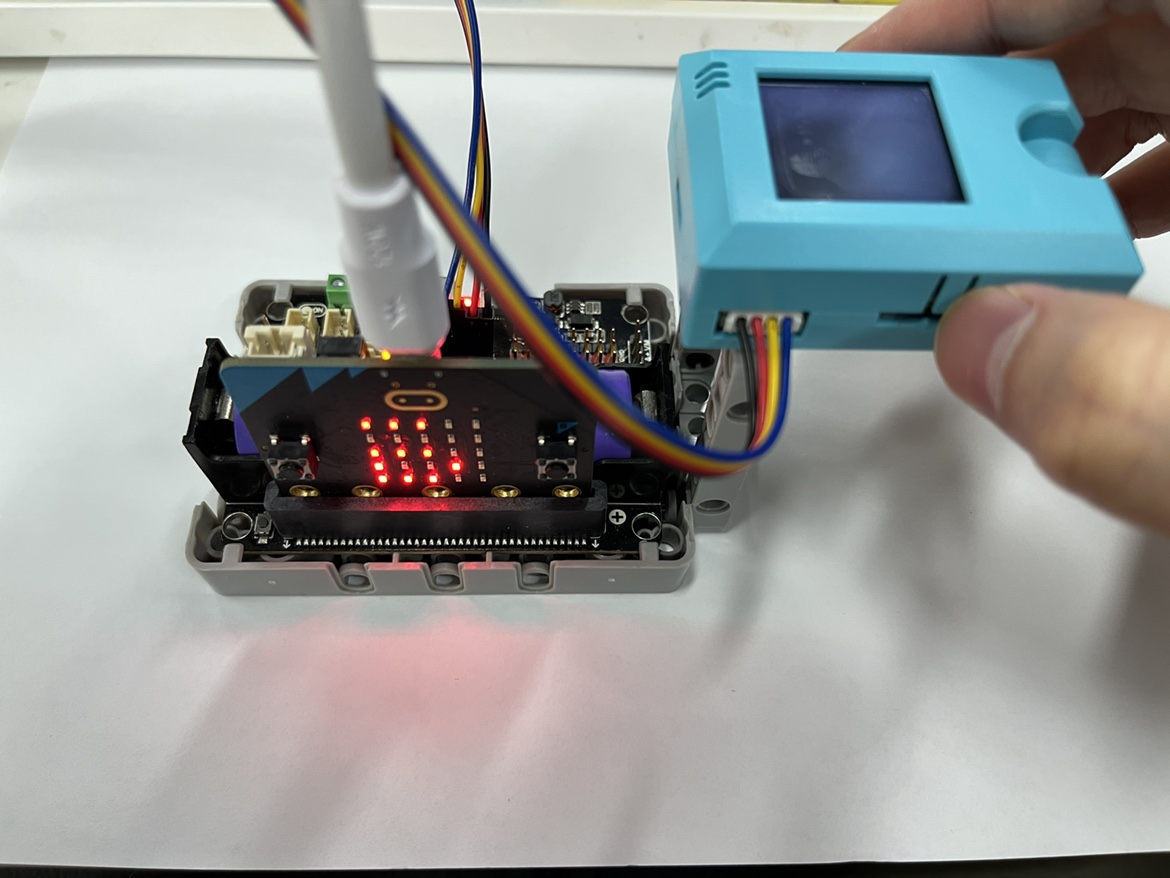
Case 2: KOI Buttons
Introduction: There are the A and B buttons on the left and right sides of the KOI module, which can be used for programming.
Program:
https://makecode.microbit.org/S61167-65456-43430-66147
 Experimental results:
When the A button of the KOI module is pressed, the Microbit dot matrix displays the letter A.
When the B button of the KOI module is pressed, the Microbit dot matrix displays the letter B.
When the A and B buttons of the KOI module are pressed at the same time, the Microbit dot matrix displays a red heart.
Experimental results:
When the A button of the KOI module is pressed, the Microbit dot matrix displays the letter A.
When the B button of the KOI module is pressed, the Microbit dot matrix displays the letter B.
When the A and B buttons of the KOI module are pressed at the same time, the Microbit dot matrix displays a red heart.
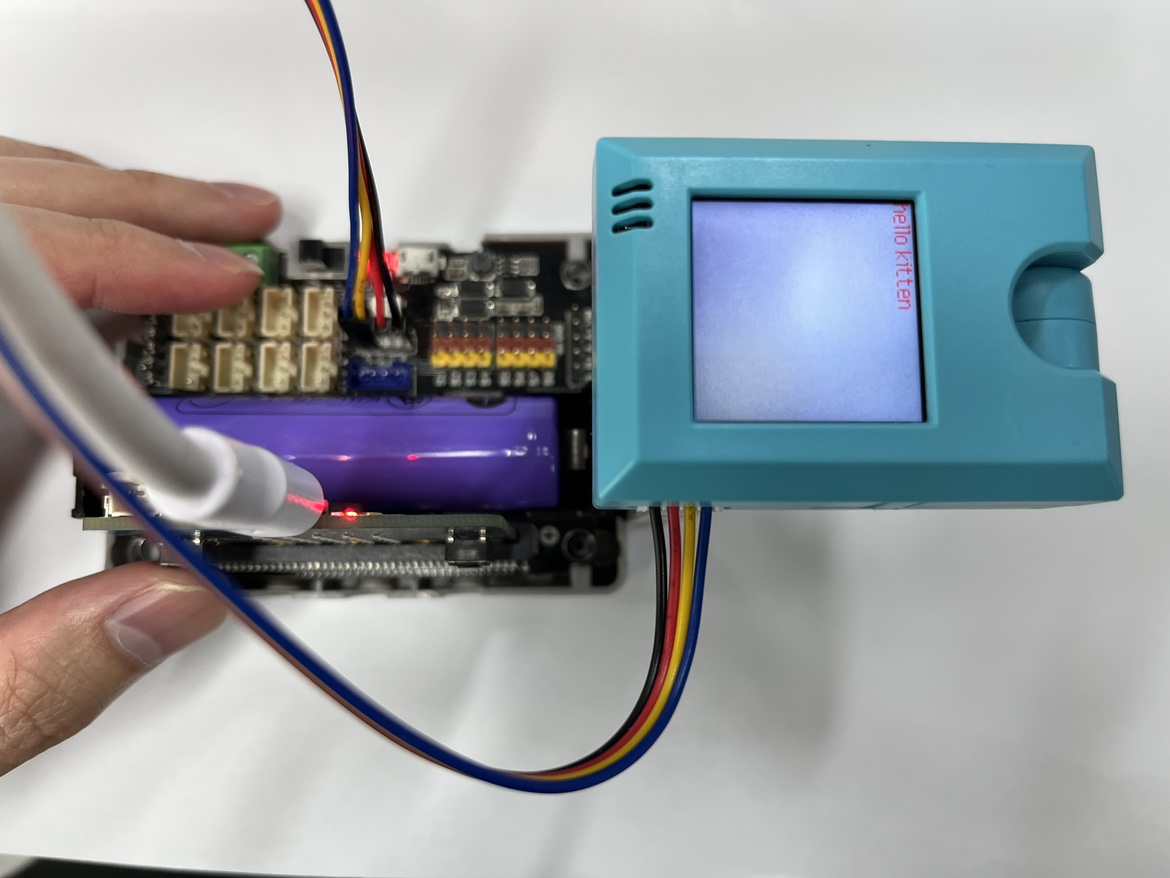
Example 3: Display Text
Introduction: The KOI module has a 1.3-inch TFT screen with 240x240 pixels. In addition to displaying some feedback information for AI functions, it can also display screen strings through programming.
Program:
https://makecode.microbit.org/S10105-15786-34494-38608
 Experimental result:
When the Microbit button A is pressed, the KOI module screen displays "hello kitten"
When the Microbit button B is pressed, the KOI module screen displays "KOI"
Experimental result:
When the Microbit button A is pressed, the KOI module screen displays "hello kitten"
When the Microbit button B is pressed, the KOI module screen displays "KOI"
Case 4: Recording
Introduction: KOI module has a microphone, which can achieve the recording function, and it also has a speaker, which can play the file.
Please note! : Recording requires an SD card, please prepare it yourself. Please insert or remove the SD card while the KOI module is powered off.
Procedure:
https://makecode.microbit.org/S45174-18526-08129-10010
 Experimental phenomenon:
When pressing Microbit button B, record for 3 seconds
When pressing Micorbit button A, play this file
Experimental phenomenon:
When pressing Microbit button B, record for 3 seconds
When pressing Micorbit button A, play this file
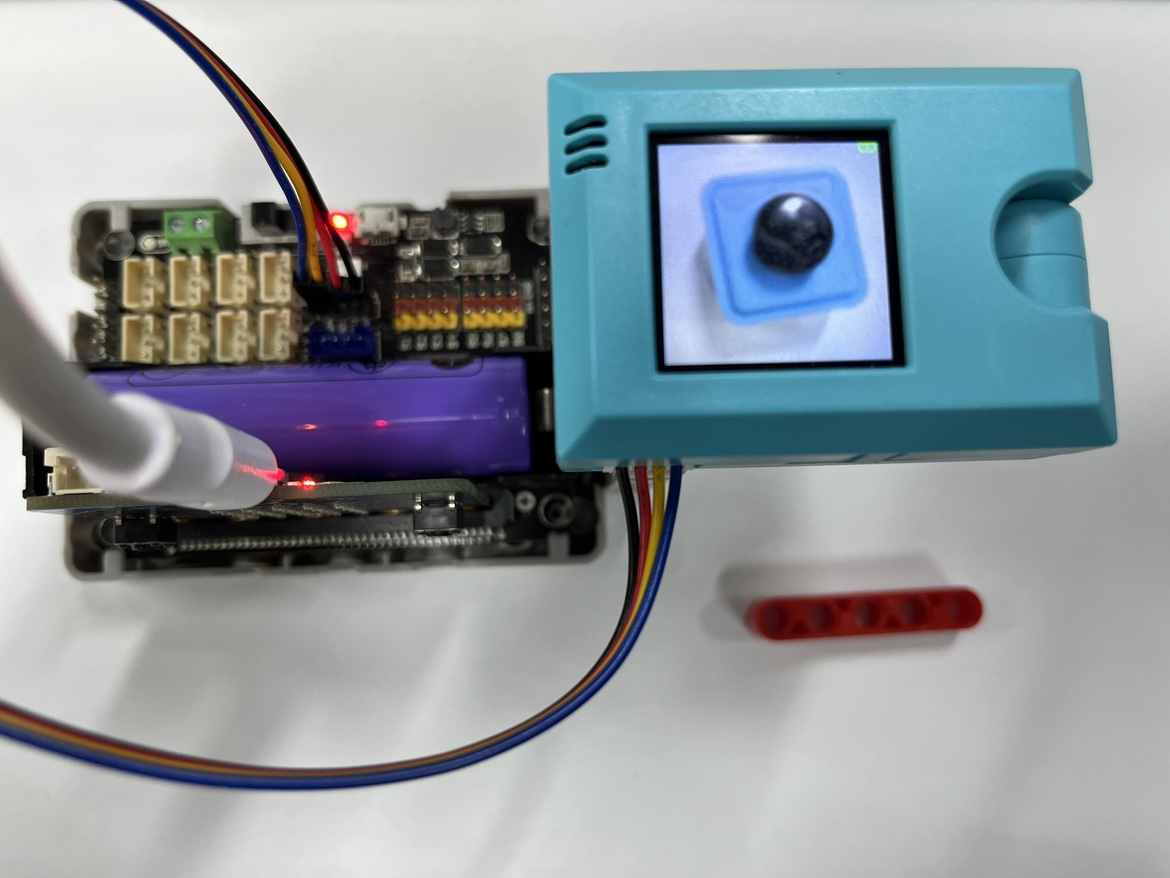
Case 5: Color Tracking
Introduction: The KOI module has built-in tracking for several colors, red, green, blue, and yellow, and it can also customize color tracking
Program:
https://makecode.microbit.org/S92879-39018-14809-61672
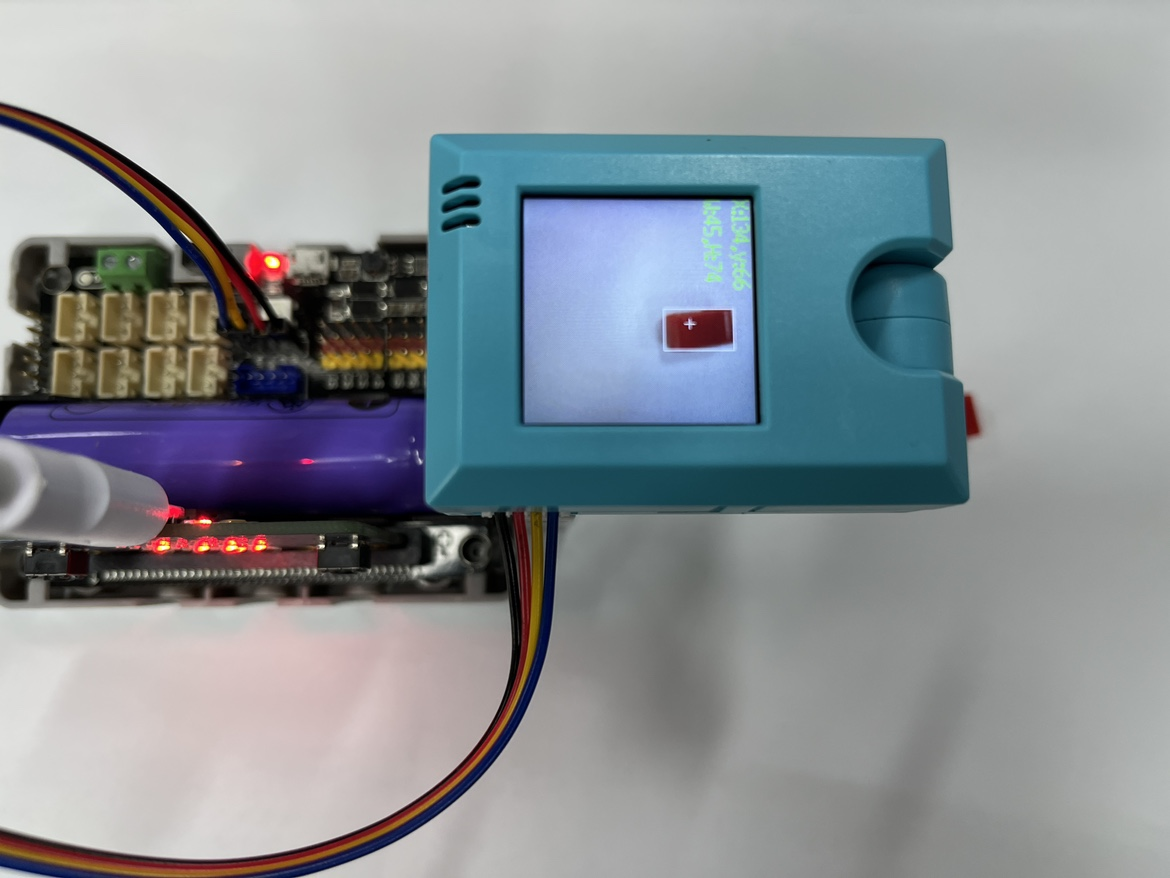
 Experimental Phenomenon:
When you press the Microbit button A, the red color block is tracked. When the red color block appears in the interface, it will be surrounded by a white frame, and the recognized coordinates and the length and width of the color block will be displayed in the upper left corner of the interface.
Experimental Phenomenon:
When you press the Microbit button A, the red color block is tracked. When the red color block appears in the interface, it will be surrounded by a white frame, and the recognized coordinates and the length and width of the color block will be displayed in the upper left corner of the interface.
Case 6: Line Tracking
Introduction: KOI modules has built-in line tracking that can be used to implement unmanned vehicles.
Code:
https://makecode.microbit.org/S30032-95451-24035-98005
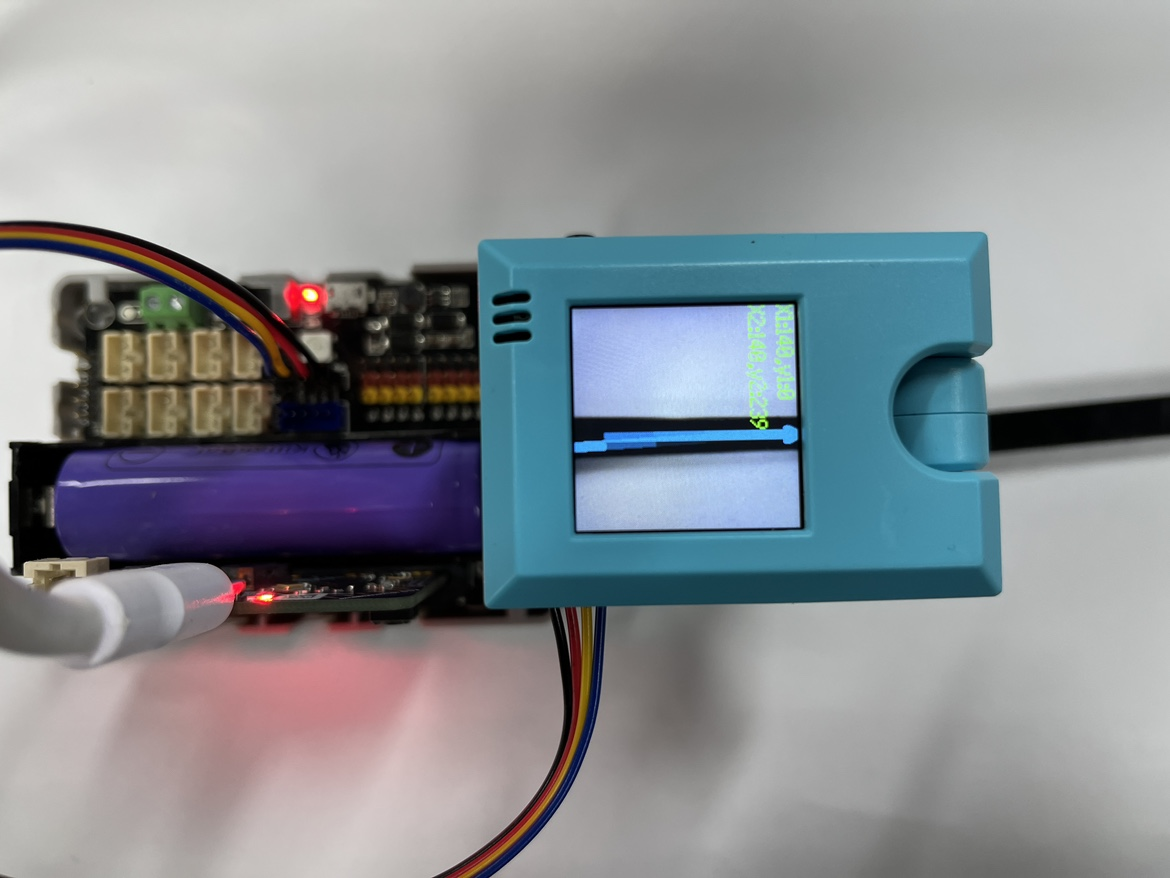
 Experimental Phenomena:
Press the A button on the Microbit to perform black line tracking. When a black line appears on the screen, the coordinate value of the line can be obtained.
Experimental Phenomena:
Press the A button on the Microbit to perform black line tracking. When a black line appears on the screen, the coordinate value of the line can be obtained.
Example 7: Facial Attributes
Introduction: Able to identify faces, and can return coordinates x and y, as well as width and height values w and h. Can also discern gender, glasses, smiles, open mouths, and the total number of faces in the frame.
Program:
https://makecode.microbit.org/S39711-67975-26643-96368
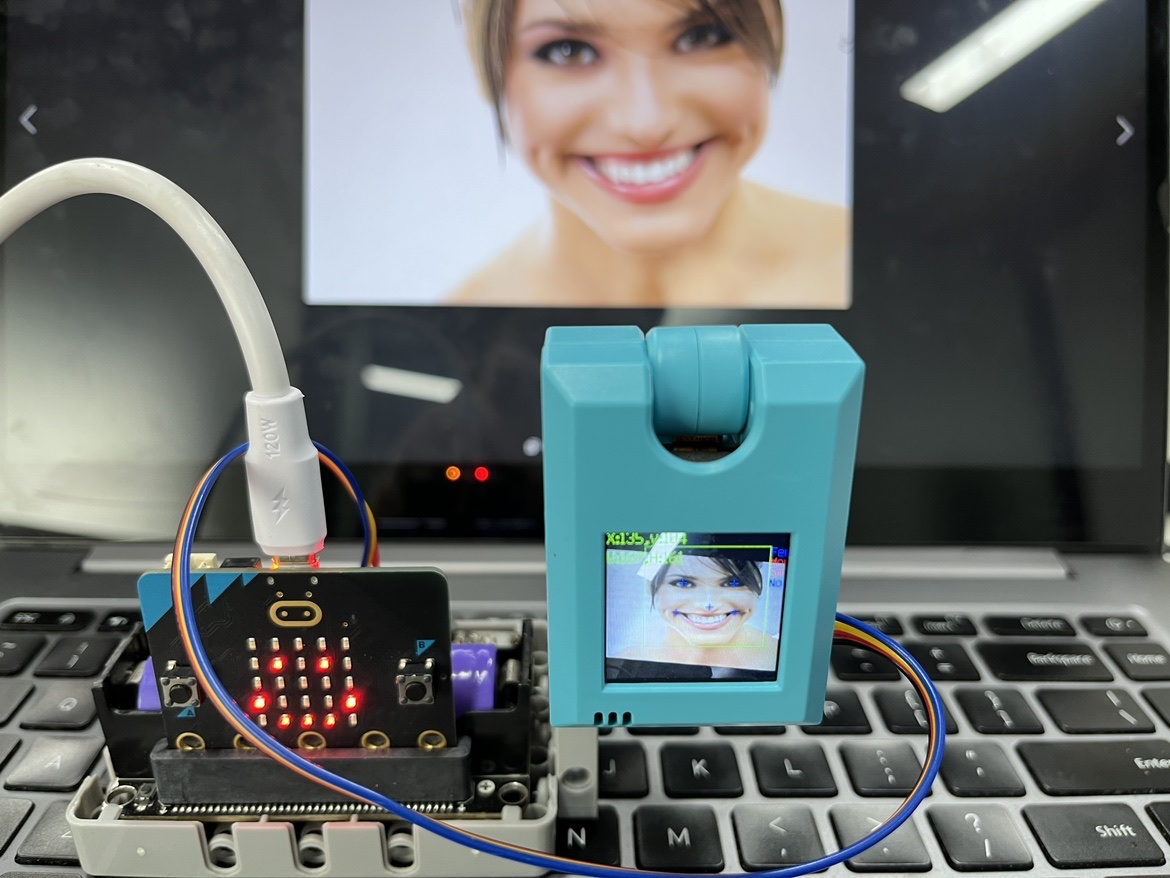
 Experimental Phenomena:
Can use Microbit's A and B buttons to switch the camera between front and back.
When a smiling face is recognized, the Microbit dot matrix displays a smiling face pattern.
Experimental Phenomena:
Can use Microbit's A and B buttons to switch the camera between front and back.
When a smiling face is recognized, the Microbit dot matrix displays a smiling face pattern.
Case 8: Face Mask
Introduction: Directly detect if a mask is worn without training
Program:
https://makecode.microbit.org/S07435-35642-85145-78418
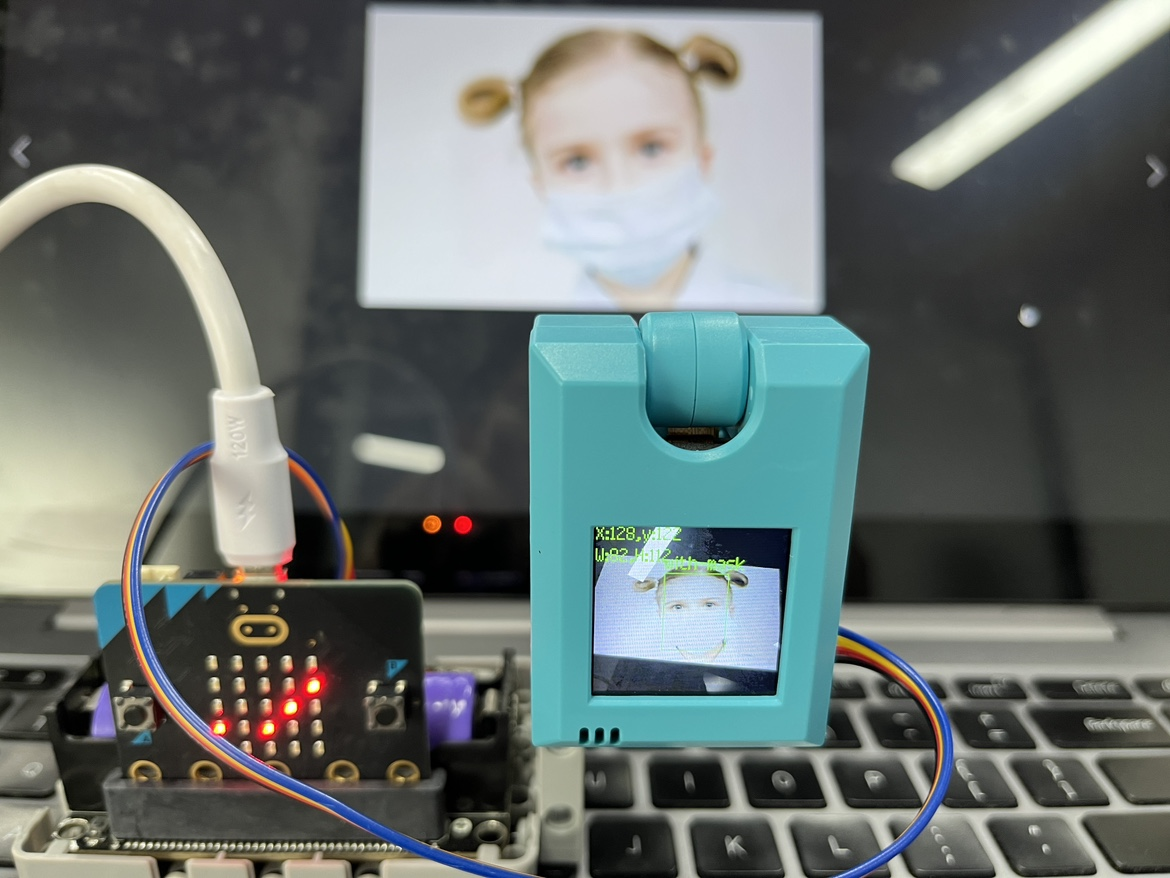
 Experimental phenomenon:
When a mask is detected, the dot matrix screen displays √, otherwise the dot matrix displays X
Experimental phenomenon:
When a mask is detected, the dot matrix screen displays √, otherwise the dot matrix displays X
Case 9: Feature classification
Introduction: Record different classifications through machine learning feature classification, and then identify them through the camera. The trained model can also be saved.
Program:
https://makecode.microbit.org/S14258-90398-44796-76732
 Experimental phenomenon:
After entering different classifications, the KOI module can correctly classify the pictures.
Experimental phenomenon:
After entering different classifications, the KOI module can correctly classify the pictures.
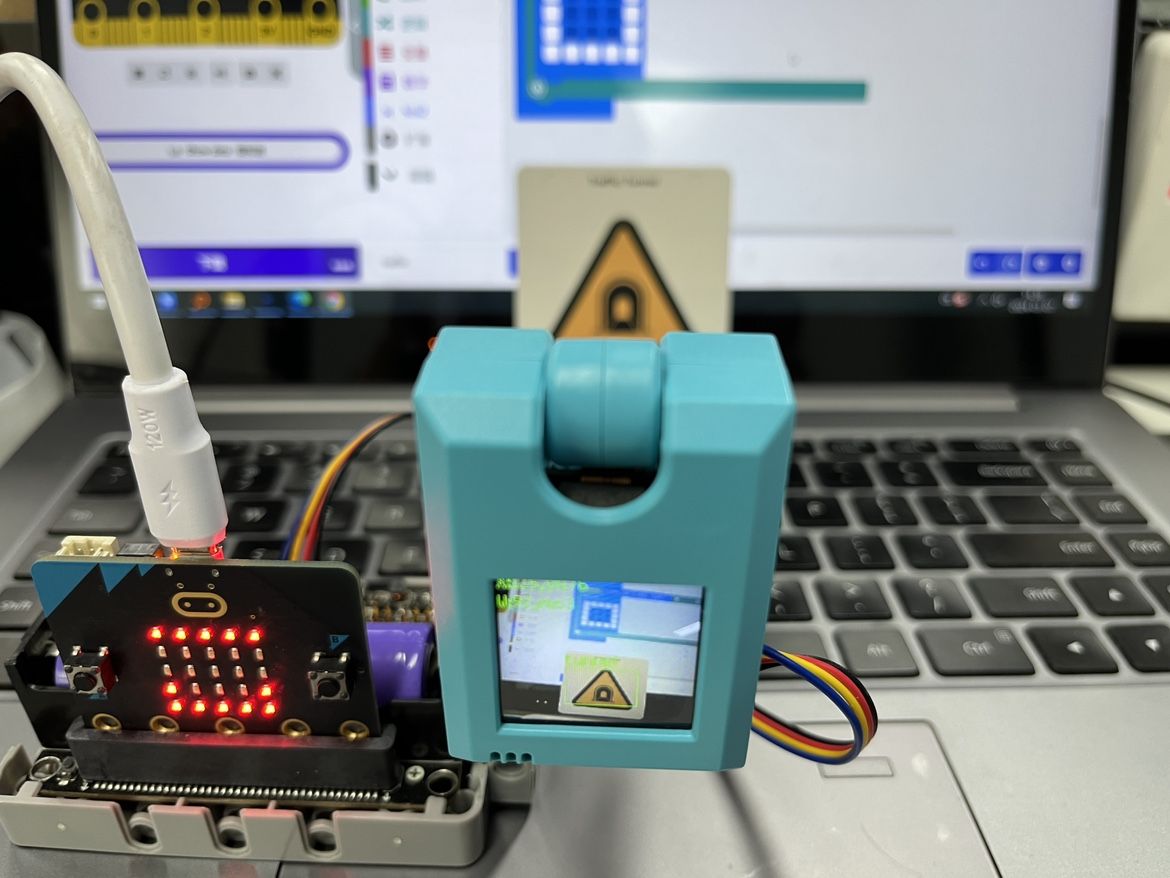
Case 10: Traffic Sign Recognition
Introduction: Based on the requirements of the AI artificial intelligence competition, the KOI module can recognize 7 types of traffic sign cards customized by kittens
Program:
https://makecode.microbit.org/S07414-85801-38322-22357

Traffic Sign Cards: There are 7 categories of traffic sign cards as follows
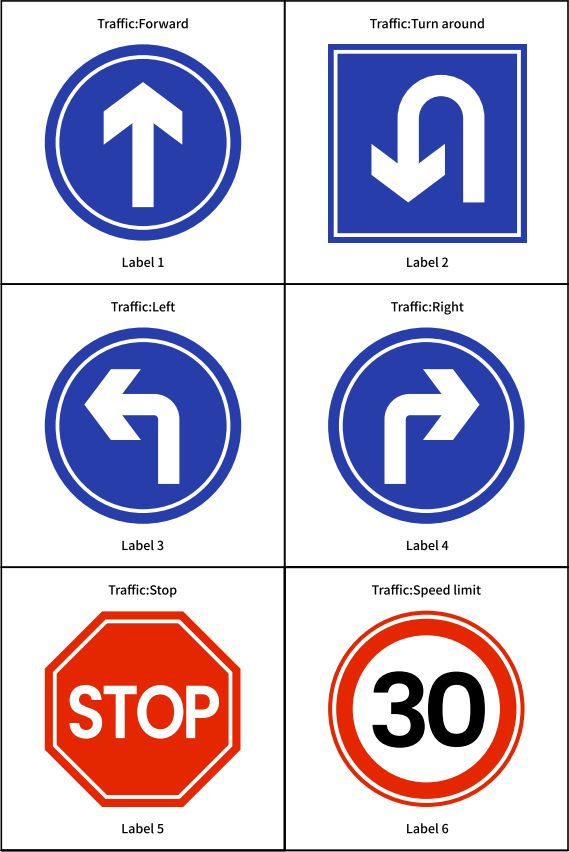
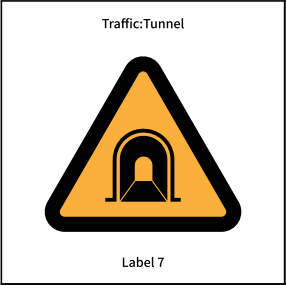
Experimental Phenomena: When different traffic cards are placed in front of the lens, the corresponding results are displayed on the Microbit dot matrix screen For example, if the tunnel sign is successfully recognized, Microibt dot matrix displays a square box
Case 11: Number Recognition
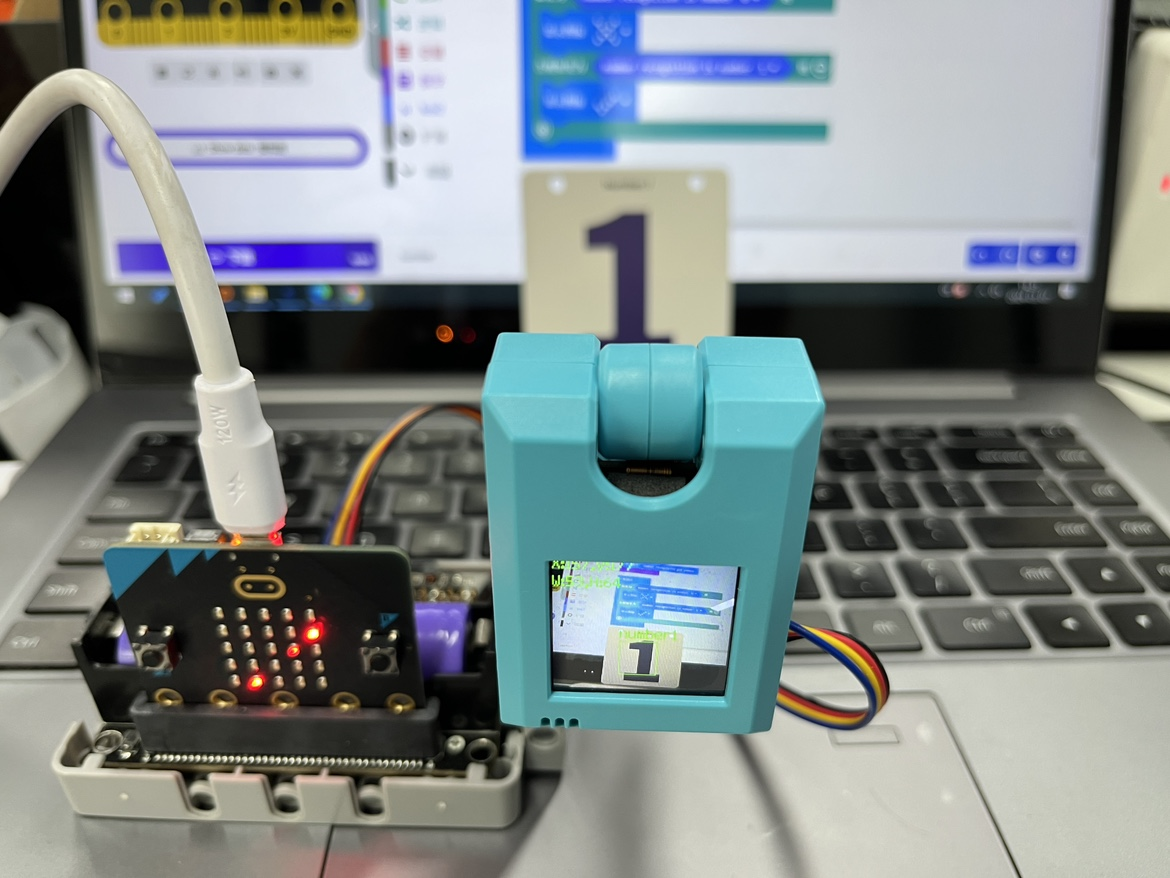
Introduction: According to the requirements of the AI artificial intelligence competition, the KOI module can recognize digital cards from 0 to 9 customized by Xiaomiao
Program:
https://makecode.microbit.org/S89329-13156-58220-68568
 Experimental phenomenon:
Place different digital cards in front of the camera, and the Microbit dot matrix screen displays the corresponding number
Experimental phenomenon:
Place different digital cards in front of the camera, and the Microbit dot matrix screen displays the corresponding number
Case 12: Letter Recognition
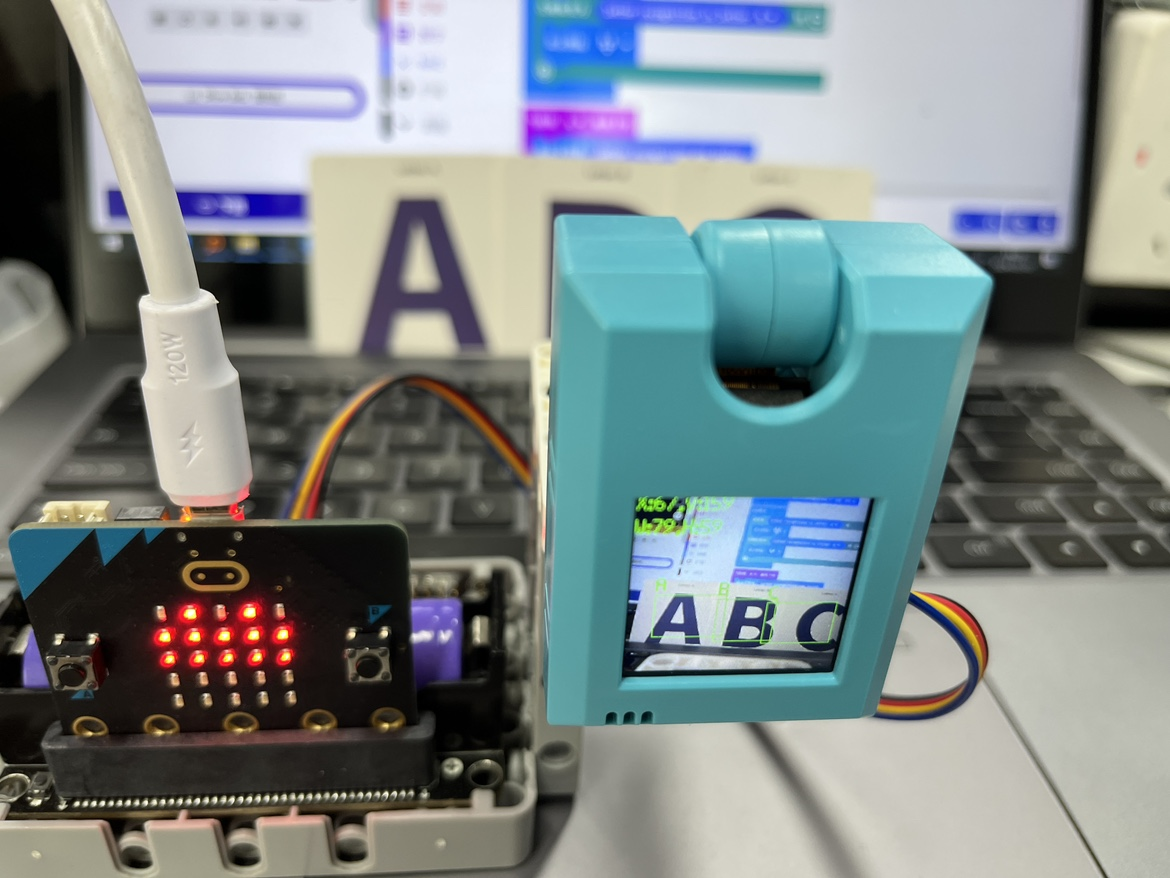
Introduction: According to the requirements of the AI artificial intelligence competition, the KOI module can identify the letter cards A~F customized by Xiaomiao.
Program:
https://makecode.microbit.org/S66558-29402-84704-55124
 Experimental Phenomena:
When different letter cards are placed in front of the lens, the Microbit dot-matrix screen displays the corresponding letters.
Experimental Phenomena:
When different letter cards are placed in front of the lens, the Microbit dot-matrix screen displays the corresponding letters.
Case13: Common Object Recognition
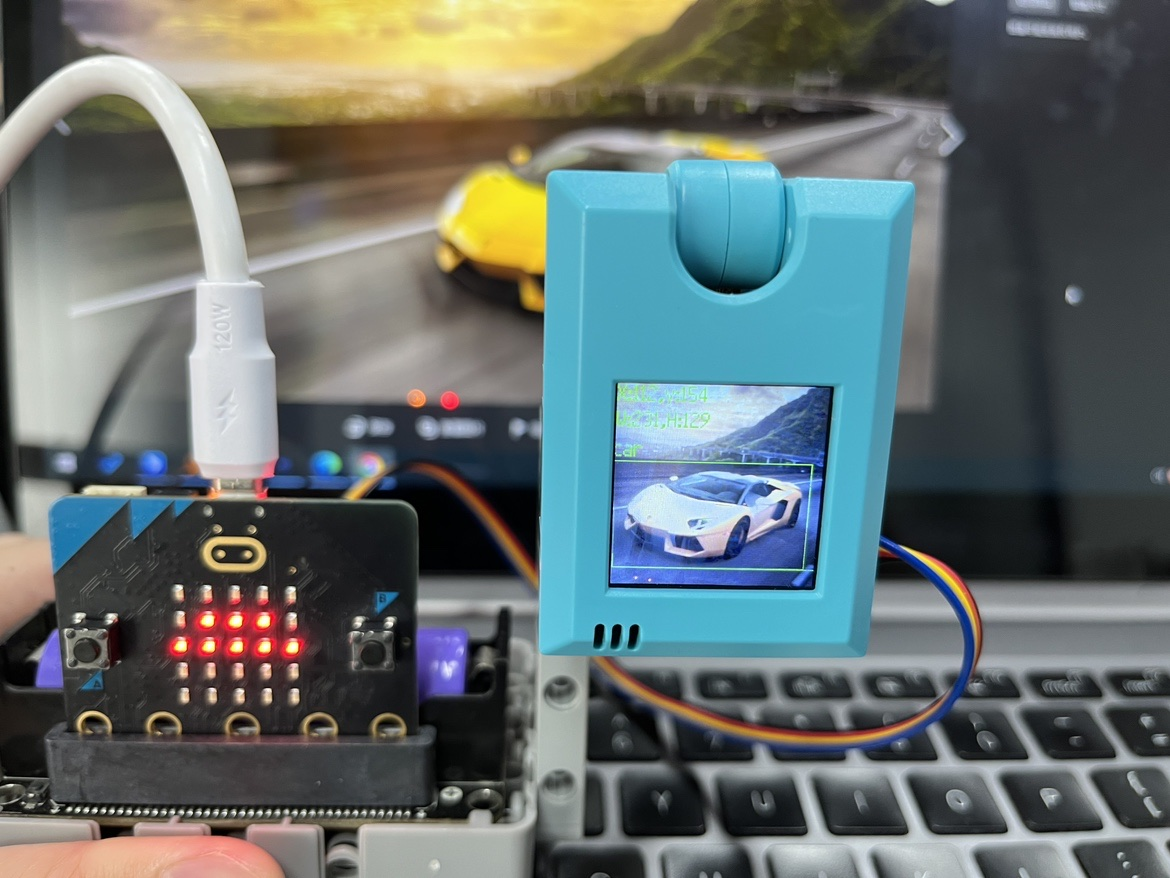
Introduction: The KOI module has a built-in common object recognition model that can recognize common real objects without training. It can recognize the following categories:
Airplane, ship, bicycle, bus, car, motorcycle, train
Bird, horse, cow, sheep, human, cat, dog
Bottle, chair, table, plant, sofa, TV Program: https://makecode.microbit.org/S93372-90317-89849-87320

Experimental phenomenon: Distinguish whether the picture is a car or a cat, Microbit dot matrix displays different patterns
Case 14: Scan the code
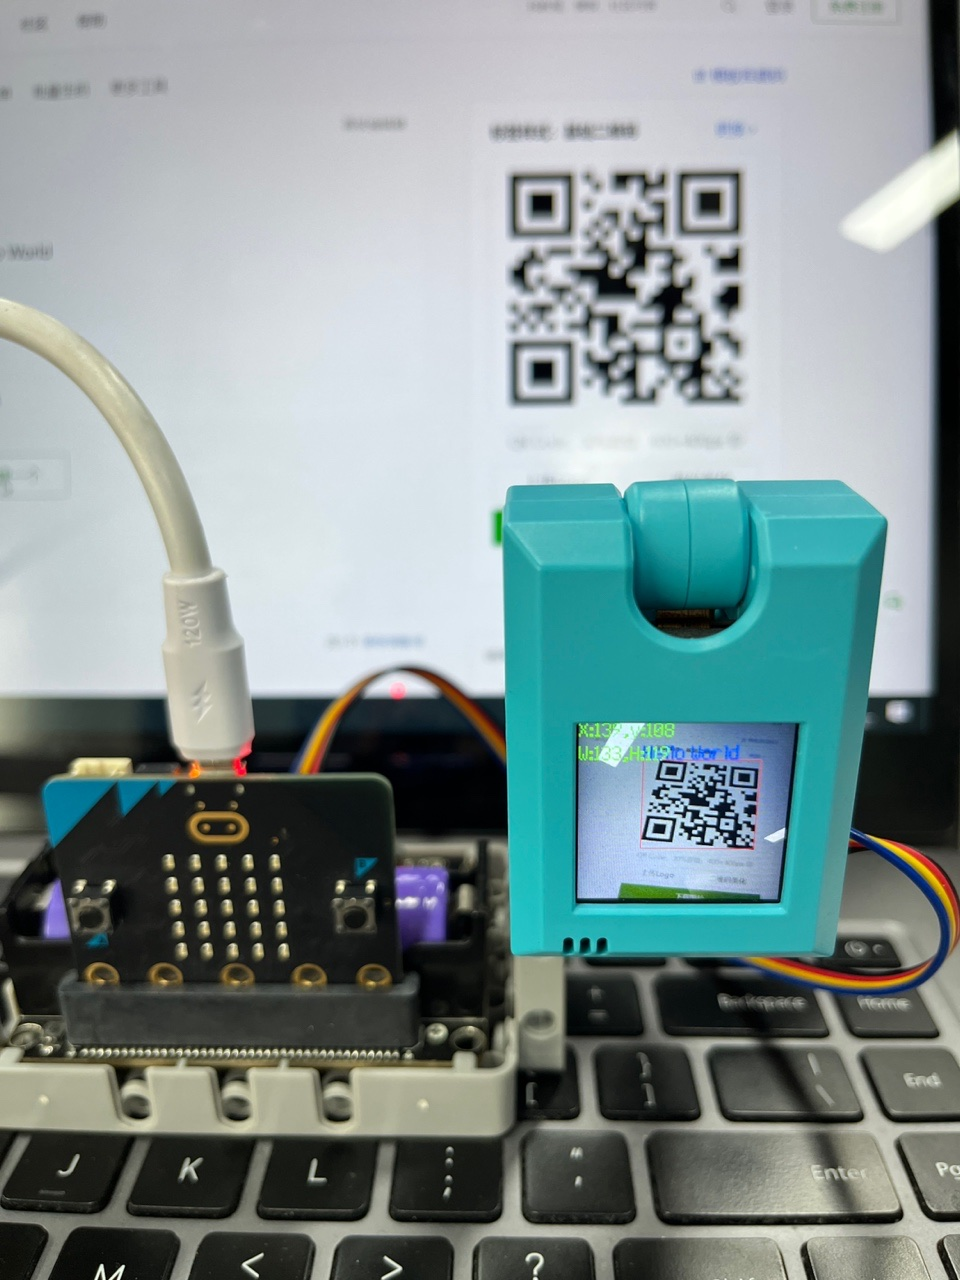
Introduction: Can recognize QR codes and barcodes
Program:
https://makecode.microbit.org/S83444-02316-45341-99521

Experimental phenomenon:
Switch the type of scanning through the A and B buttons of Microbit. When the Microbot logo is pressed, the dot matrix displays the obtained result.
The QR code content here is "Hello World"
Case 15: MQTT and Feature Classification
Introduction: This case is a project that combines MQTT functions and feature classification. The feature classification result is transmitted to the IOT server via WIFI.
Program:
https://makecode.microbit.org/S99733-64623-49667-91856
 Need to modify:
In the AP block, replace the WIFI account and password with your own. Only 2.4GWIFI is supported. If your home WIFI is not successful, please try to use a mobile hotspot.

If you use Kitten's IOT platform https://iot.kittenbot.cn/, you need to register for Topic first. Of course, you can also use other platforms that support MQTT.
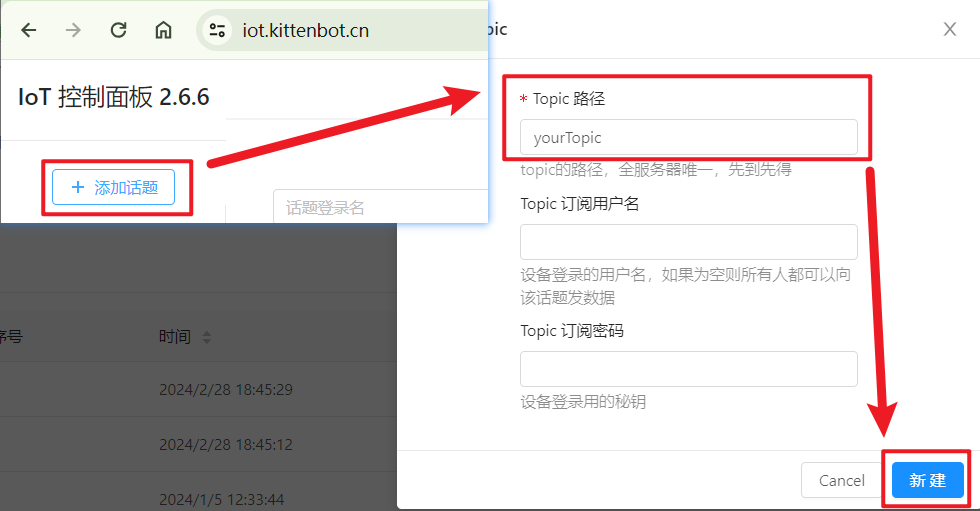
Modify the corresponding Topic name in the program
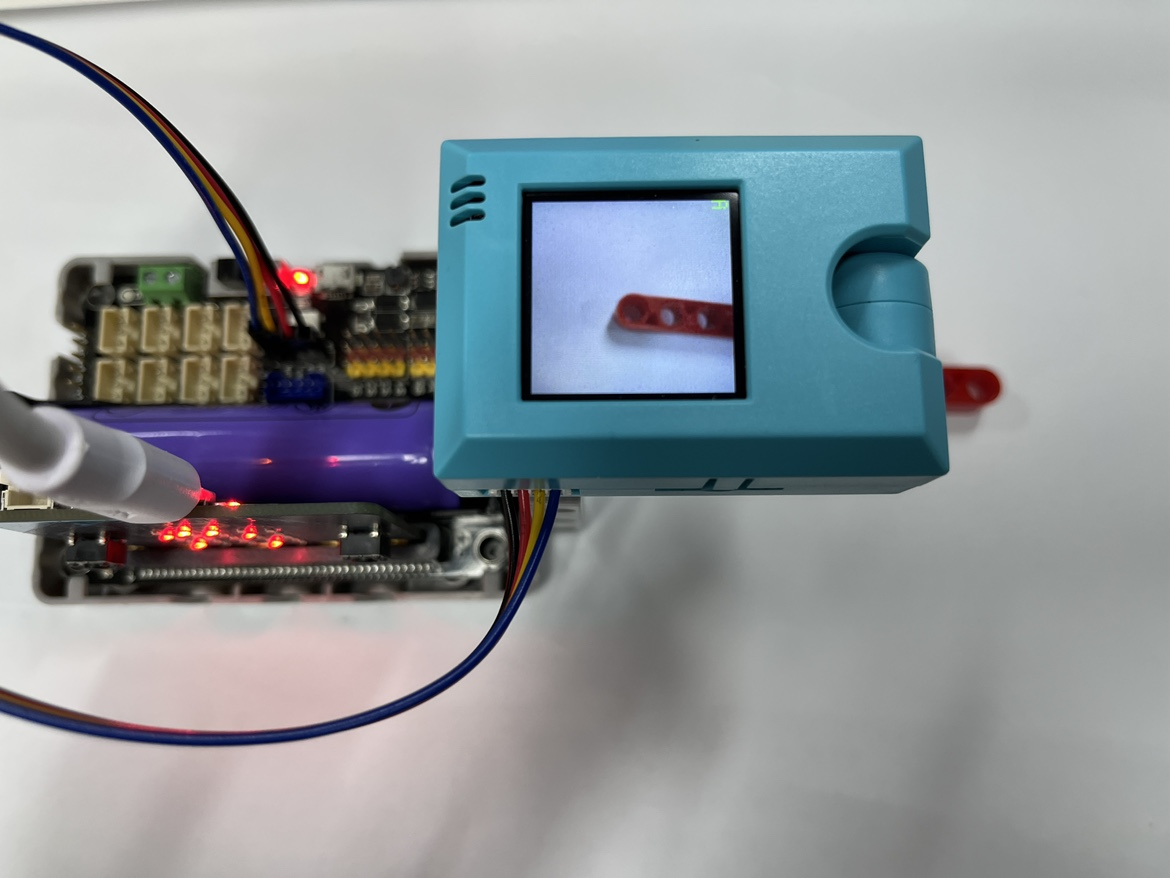
 Experimental phenomenon:
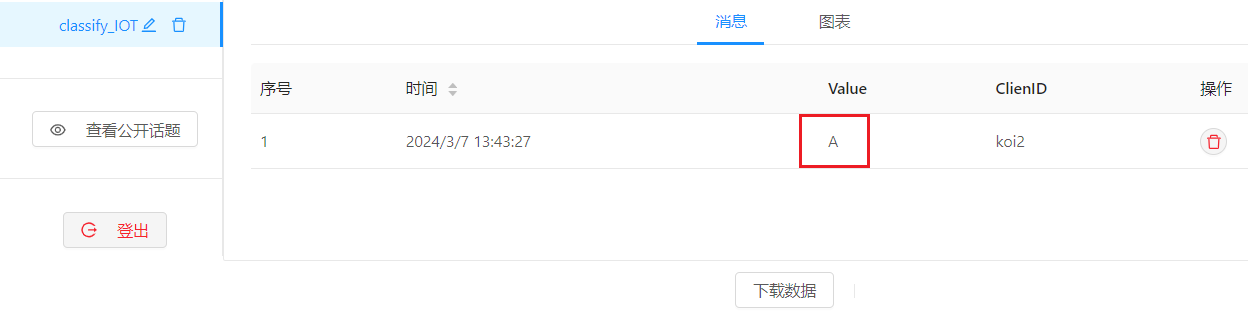
After entering two different classifications through the A and B buttons of Microbit, when the A+B button is pressed, the classification result is recognized and the classification result is pushed to the IOT platform.
Hardware result display:
Experimental phenomenon:
After entering two different classifications through the A and B buttons of Microbit, when the A+B button is pressed, the classification result is recognized and the classification result is pushed to the IOT platform.
Hardware result display:
IOT platform result display: